
How to Approve Facebook Group Members Individually in Group Leads
GroupLeads allows you to easily approve new members while automating data collection. By ensuring the extension is active on your Facebook group page, you can streamline the approval process and seamlessly integrate member details into your Google Sheet and email marketing system.
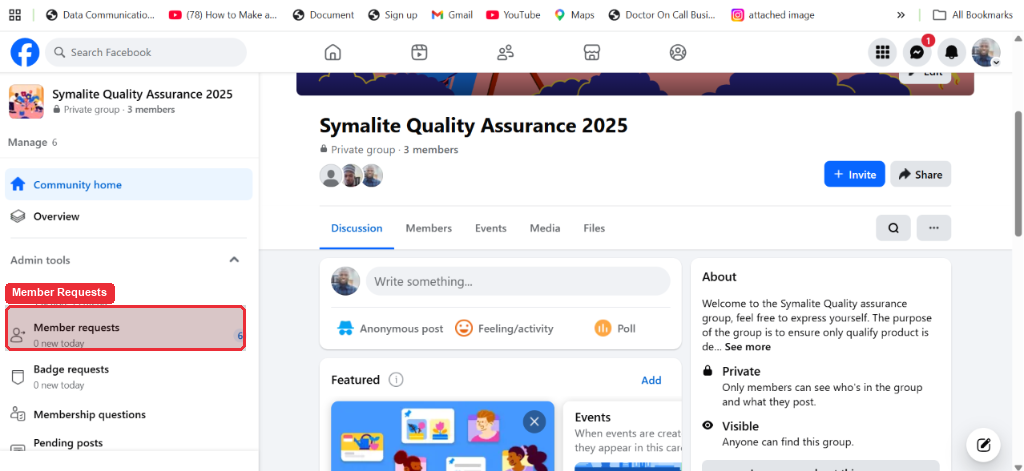
Step 1: Open Your Facebook Group Member Requests
- Navigate to your Facebook group and click Member requests in the left admin menu.
- Ensure the GroupLeads Chrome Extension is logged in and active.
Step 2: Verify GroupLeads Active Status (Red Button)
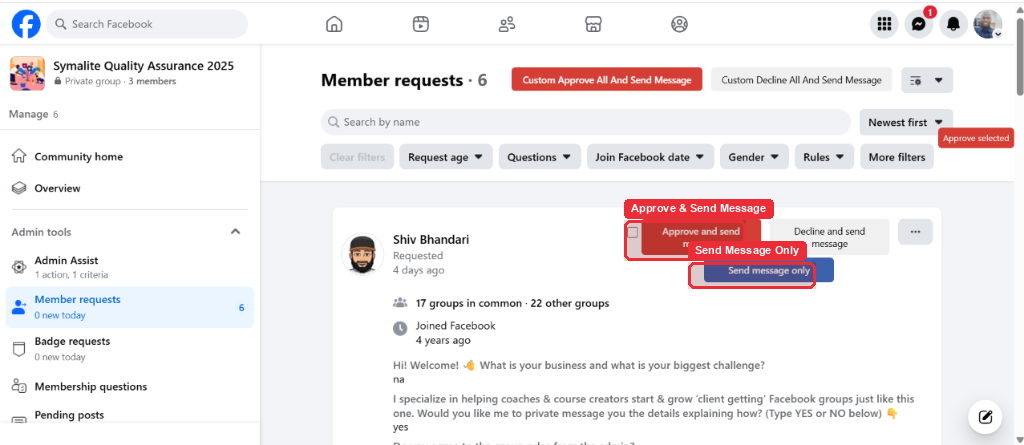
- Locate the Approve button next to an applicant's name.
- Confirm that the button displays in Red — this red styling indicates that the GroupLeads extension is active on the page and ready to process lead data.
Note: If the button appears in standard Facebook styling, open the GroupLeads extension from your browser toolbar to confirm you are logged in.
Step 3: Approve the Member Individually
- Click the red Approve button next to the individual member's request to approve them into the group.
What Happens Next?
Once you click approve, GroupLeads automatically handles background data collection:
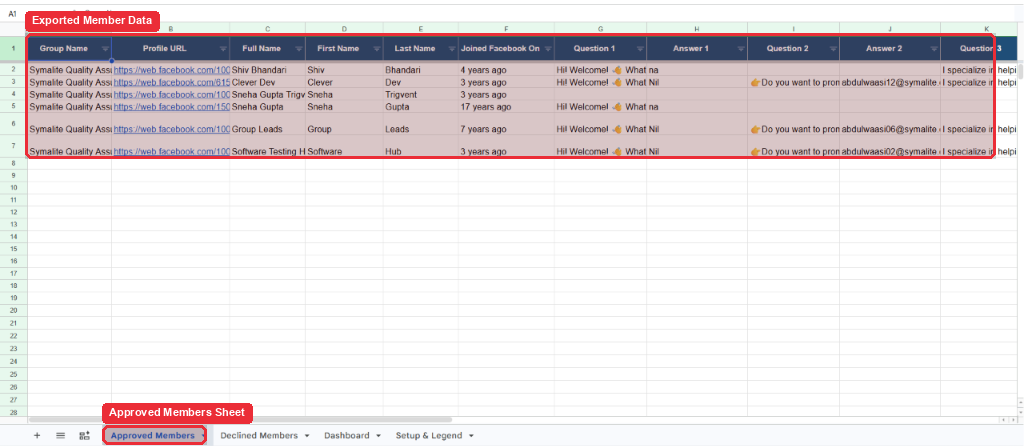
- Google Sheets Sync: The member’s profile details and answers to membership questions are automatically logged into your connected Google Sheet.
- Email Marketing / CRM Sync: Their submitted email address is dispatched directly to your connected autoresponder or CRM system.
🎉 That's it! You have successfully approved a new member while automatically capturing their lead data.