
How to Disable Automatic Member Approval in GroupLeads
This guide will help you turn off the Automatic Approval feature in GroupLeads, so you can manually review and approve new Facebook group members instead.
Step 1: Open the Auto-Approval Settings
- Open the GroupLeads extension toolbar menu.
- Locate the group you want to manage in your group list and click the Settings icon (⚙️) next to your group name.

Step 2: Toggle Off Automatic Approval
- In the sidebar settings panel, click the Auto Approve tab at the top right.
- Locate the Enable Automatic Approval switch.
- Toggle the switch to the left (OFF) to disable automatic background approval.

Step 3: Save Your Changes
- Scroll to the bottom of the settings page.
- Click Update Settings (or Update) to save your changes.

✅ Note: Once updated successfully, GroupLeads will stop automatically processing background approvals, and the automatic approval pop-up will no longer appear when new members request to join.
Step 4: Approve New Members Manually
Now that auto-approval is turned off, you will need to review and approve new member requests manually:
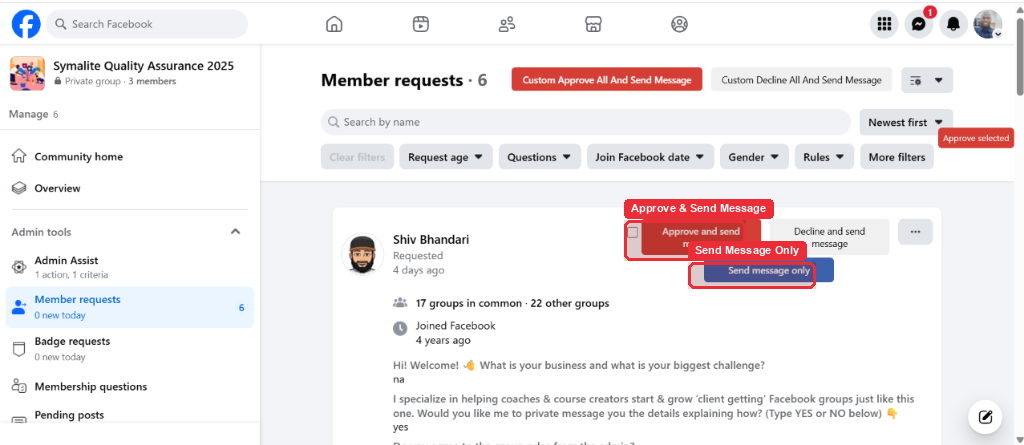
- Go to the Member requests page in your Facebook group.
- Scroll to each pending applicant and click the red Approve and send message (or Custom Approve All) button to approve them into your group while syncing their data to your Google Sheet and CRM.
✅ 🎉 You're all set! You have successfully disabled automatic approval and returned to manual member review.