
How to Integrate Group Leads with Shopify
Connecting your Shopify store to GroupLeads allows you to automatically create new customer profiles, sync email addresses, and assign marketing tags to Facebook Group members directly inside your Shopify Admin.
Follow the step-by-step guide below to create a custom Shopify App, generate an Admin API Access Token, retrieve your Store Domain URL, and connect them using the CRM tab in the GroupLeads Chrome Extension.
Prerequisites
- An active Shopify store with Admin access.
- GroupLeads Chrome Extension installed and connected to a Google Sheet.
- Facebook Group membership questions configured.
Step 1: Create a Custom App in Shopify
- Log in to your Shopify Admin dashboard (
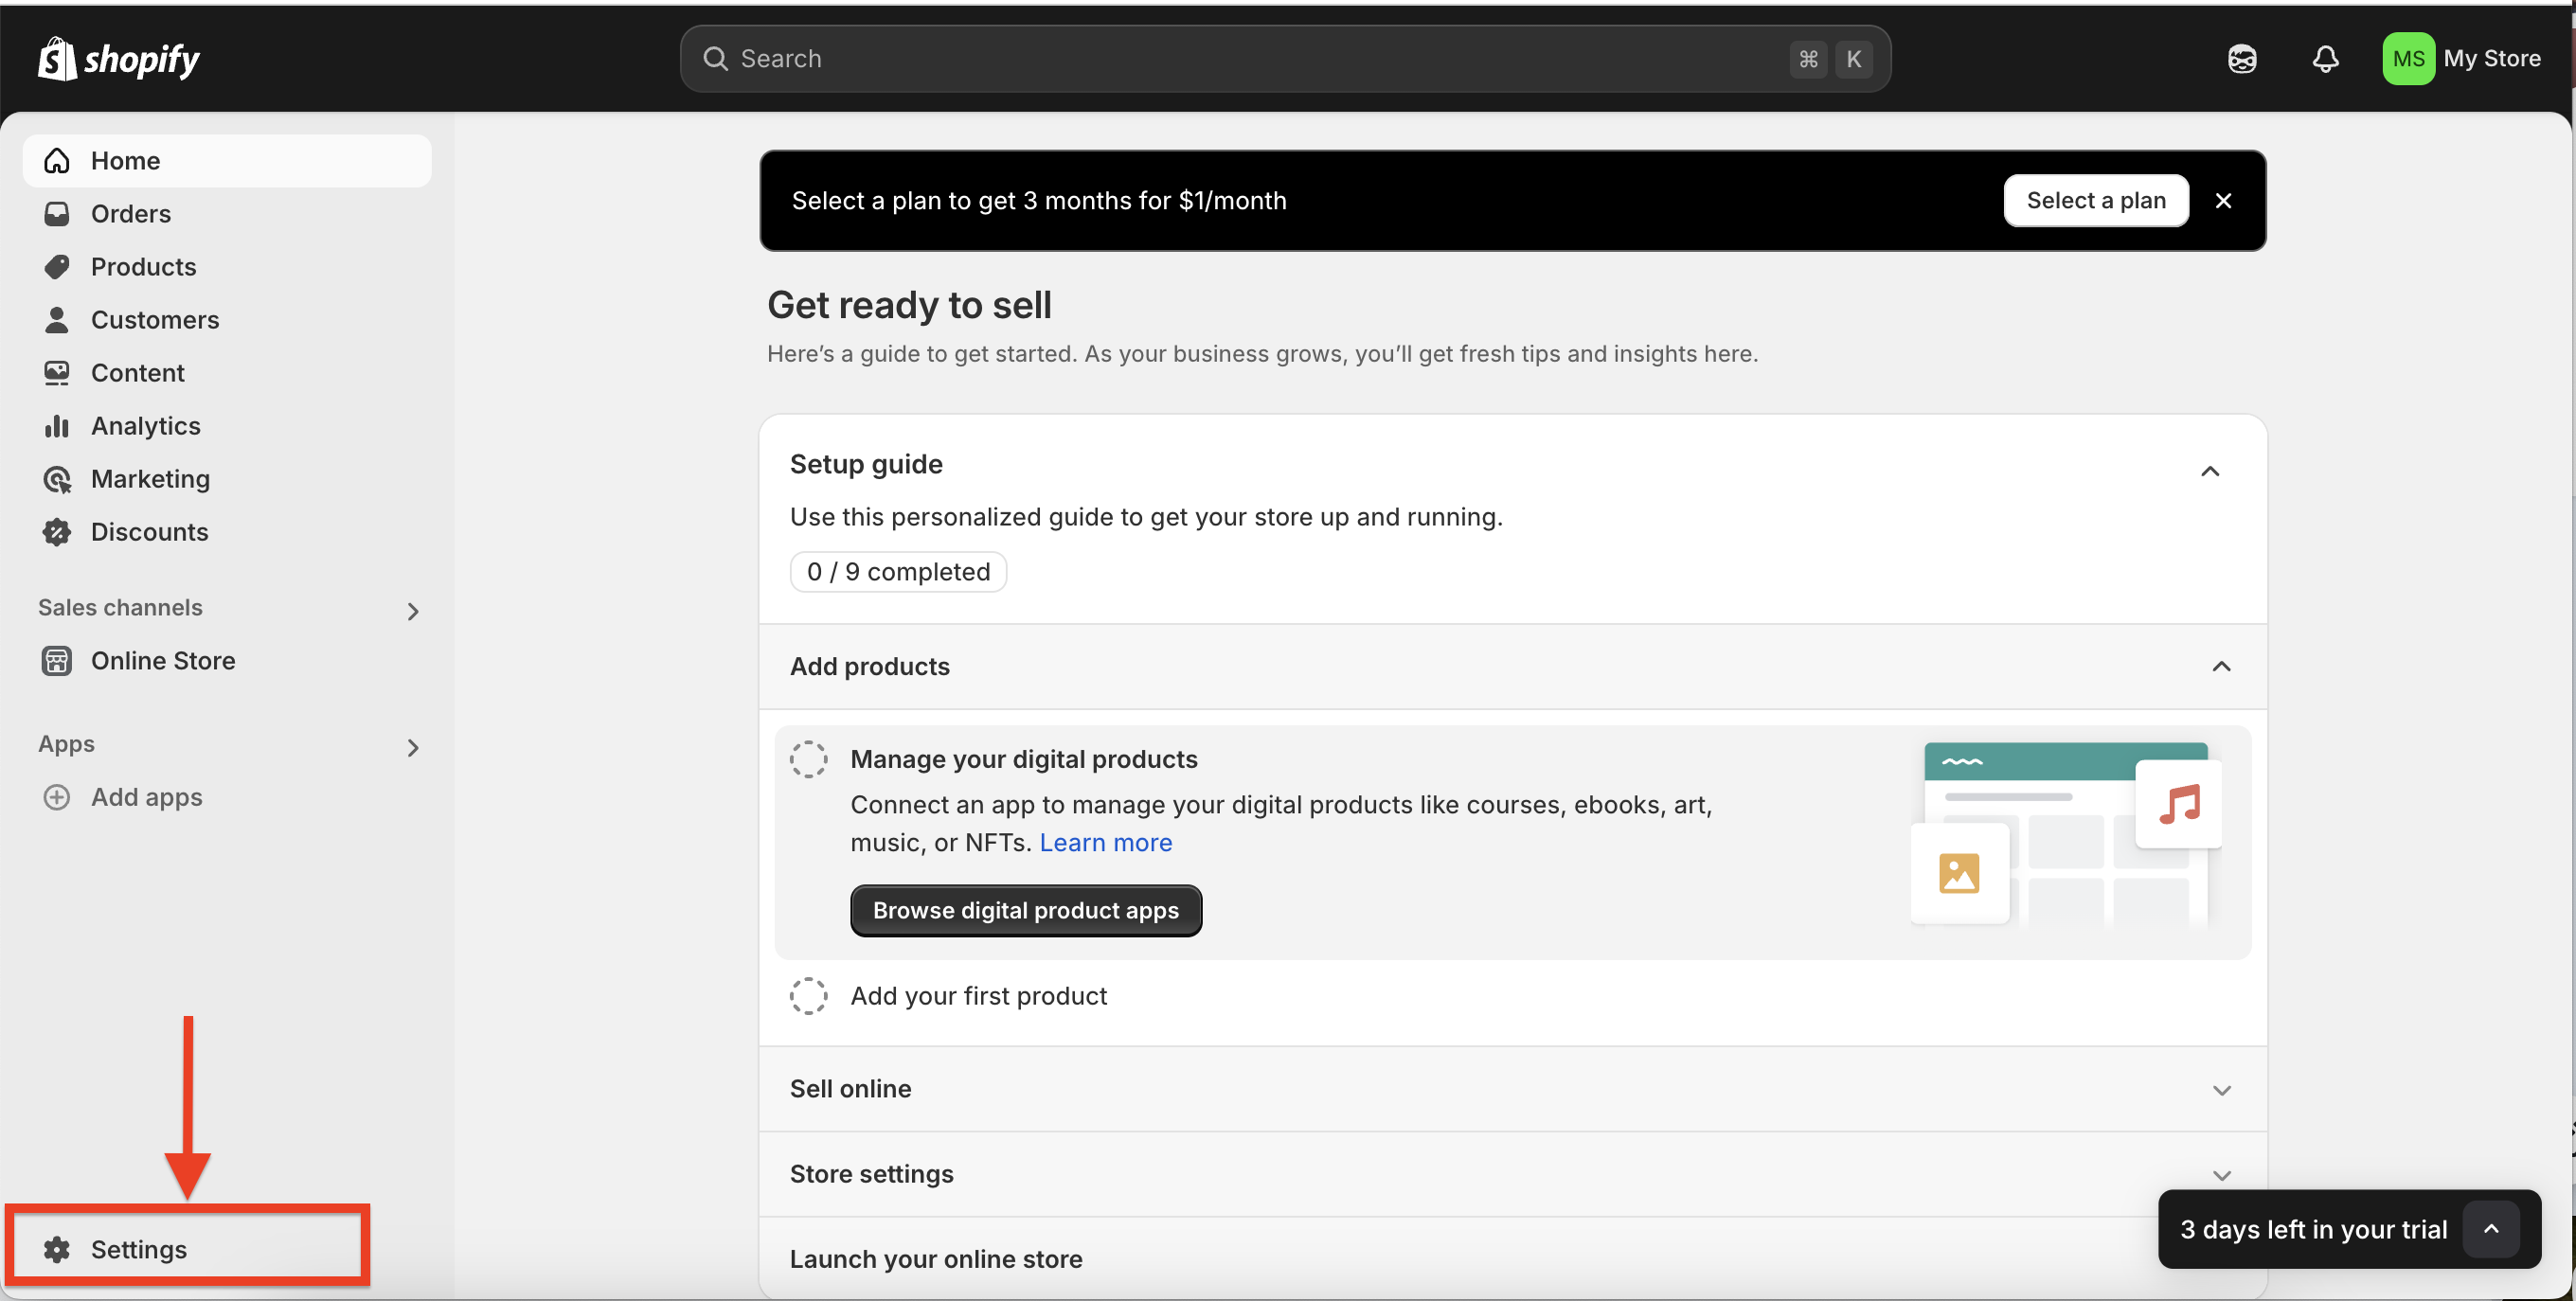
admin.shopify.com). - Click Settings (⚙) in the bottom-left corner of the sidebar.
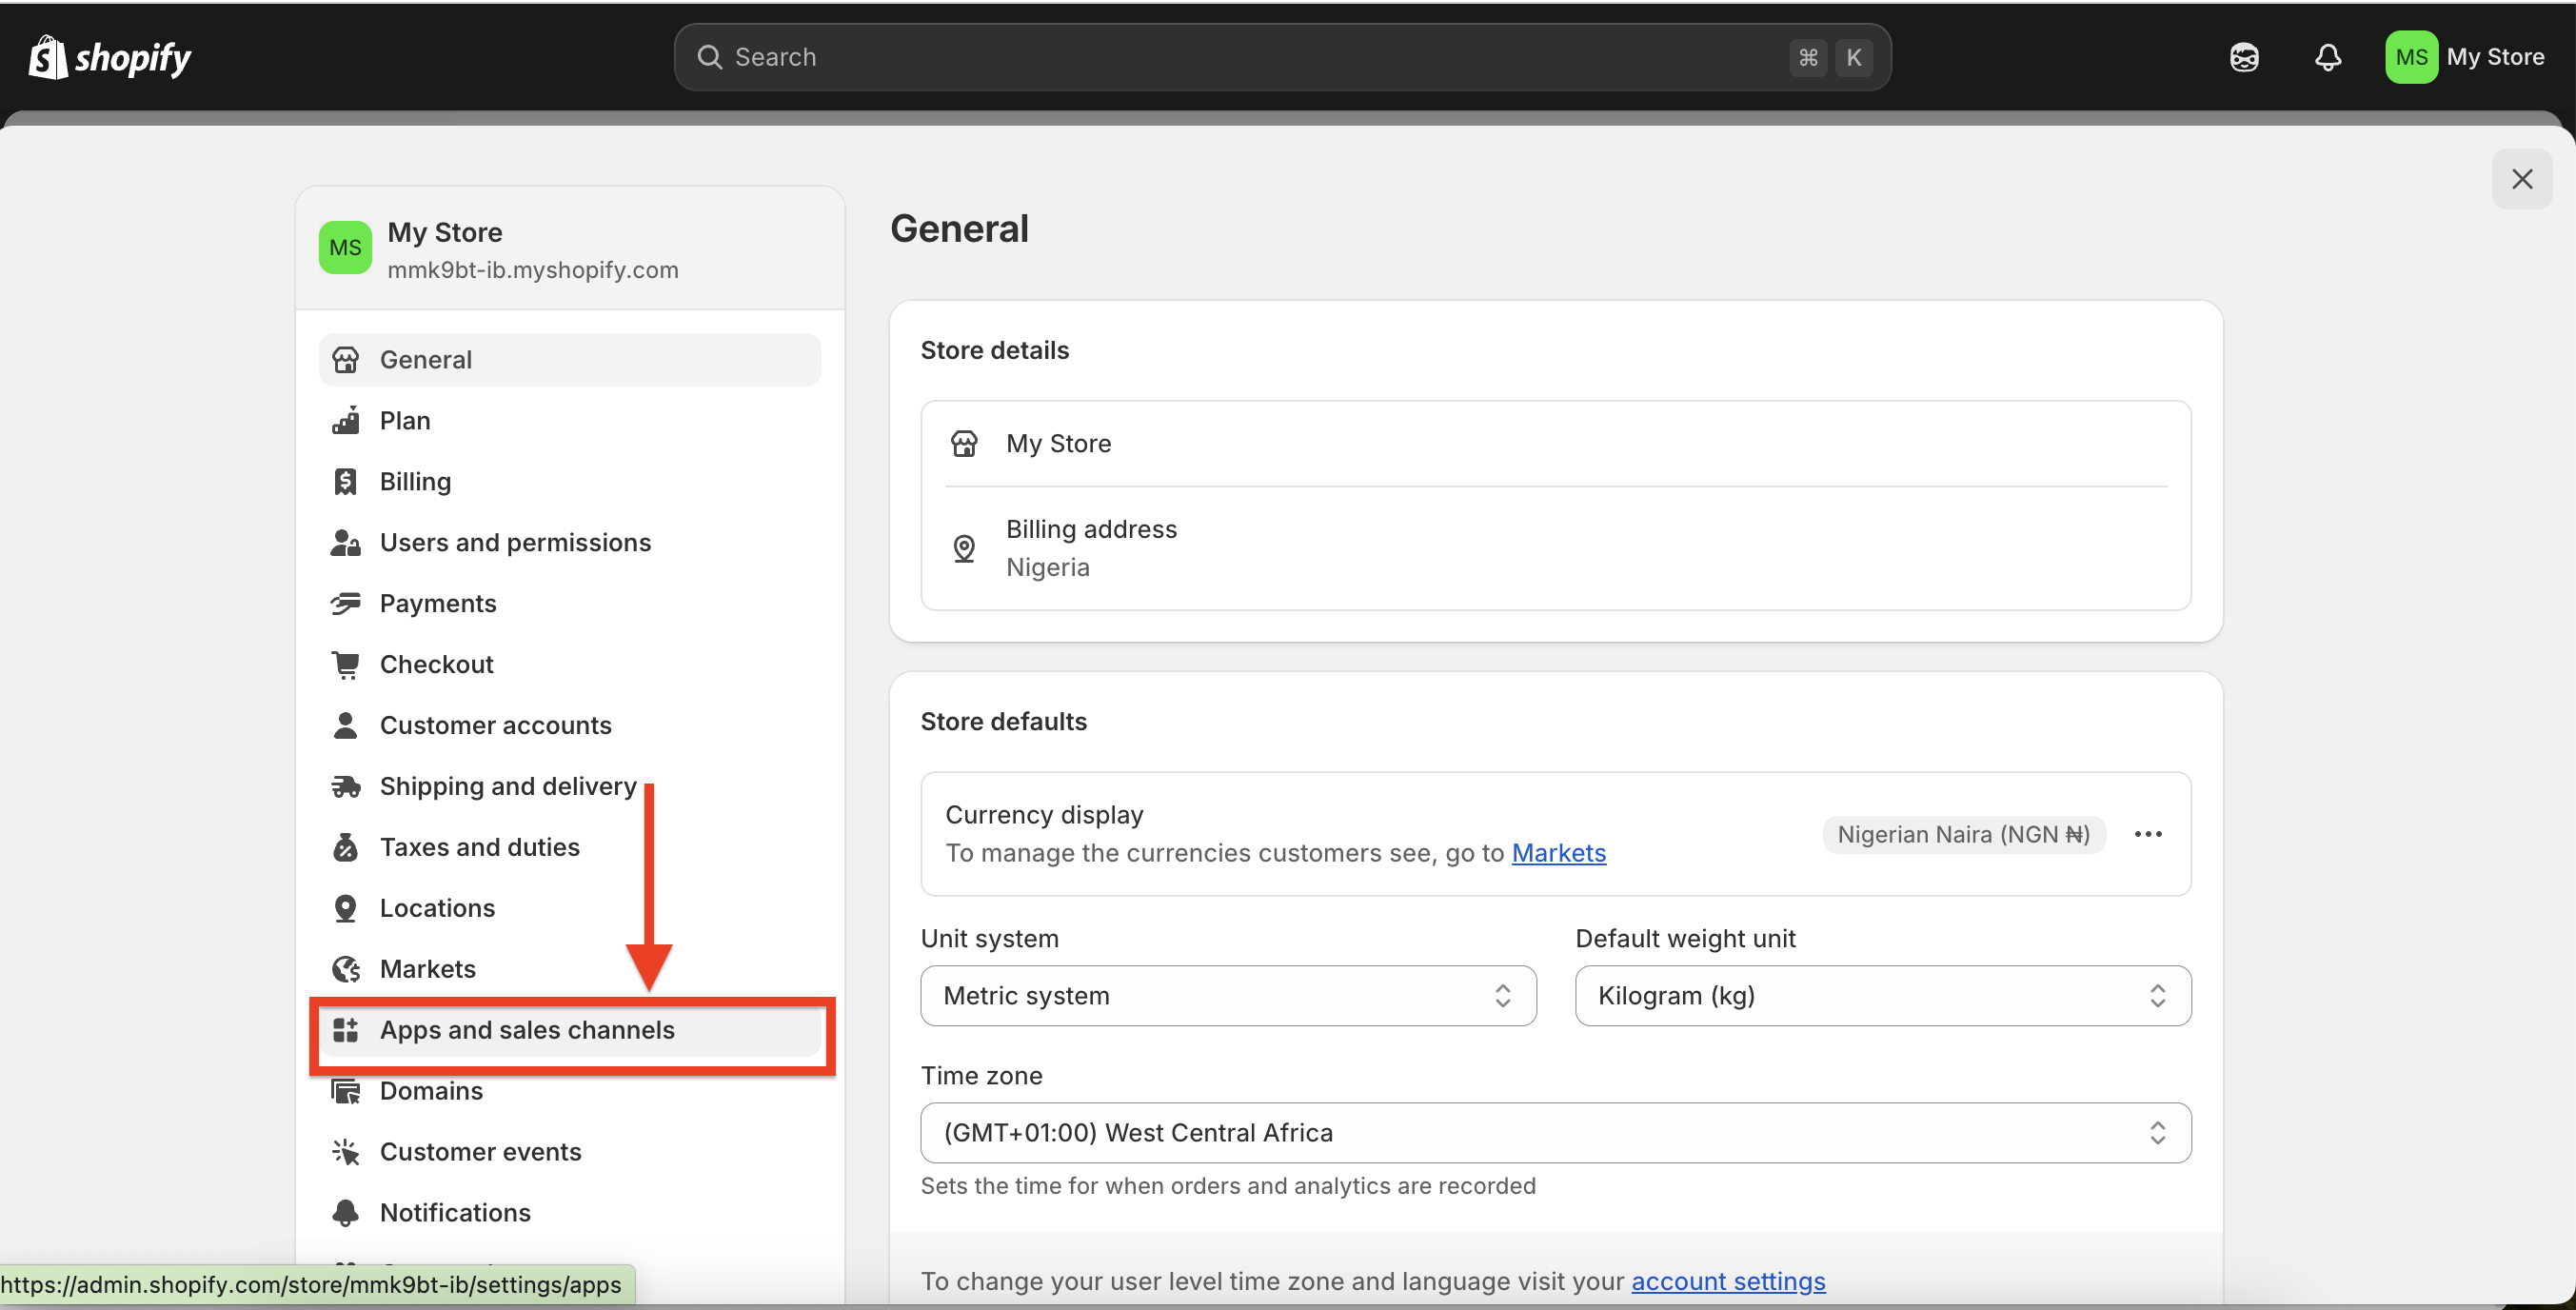
- In the left navigation menu, click Apps and sales channels.
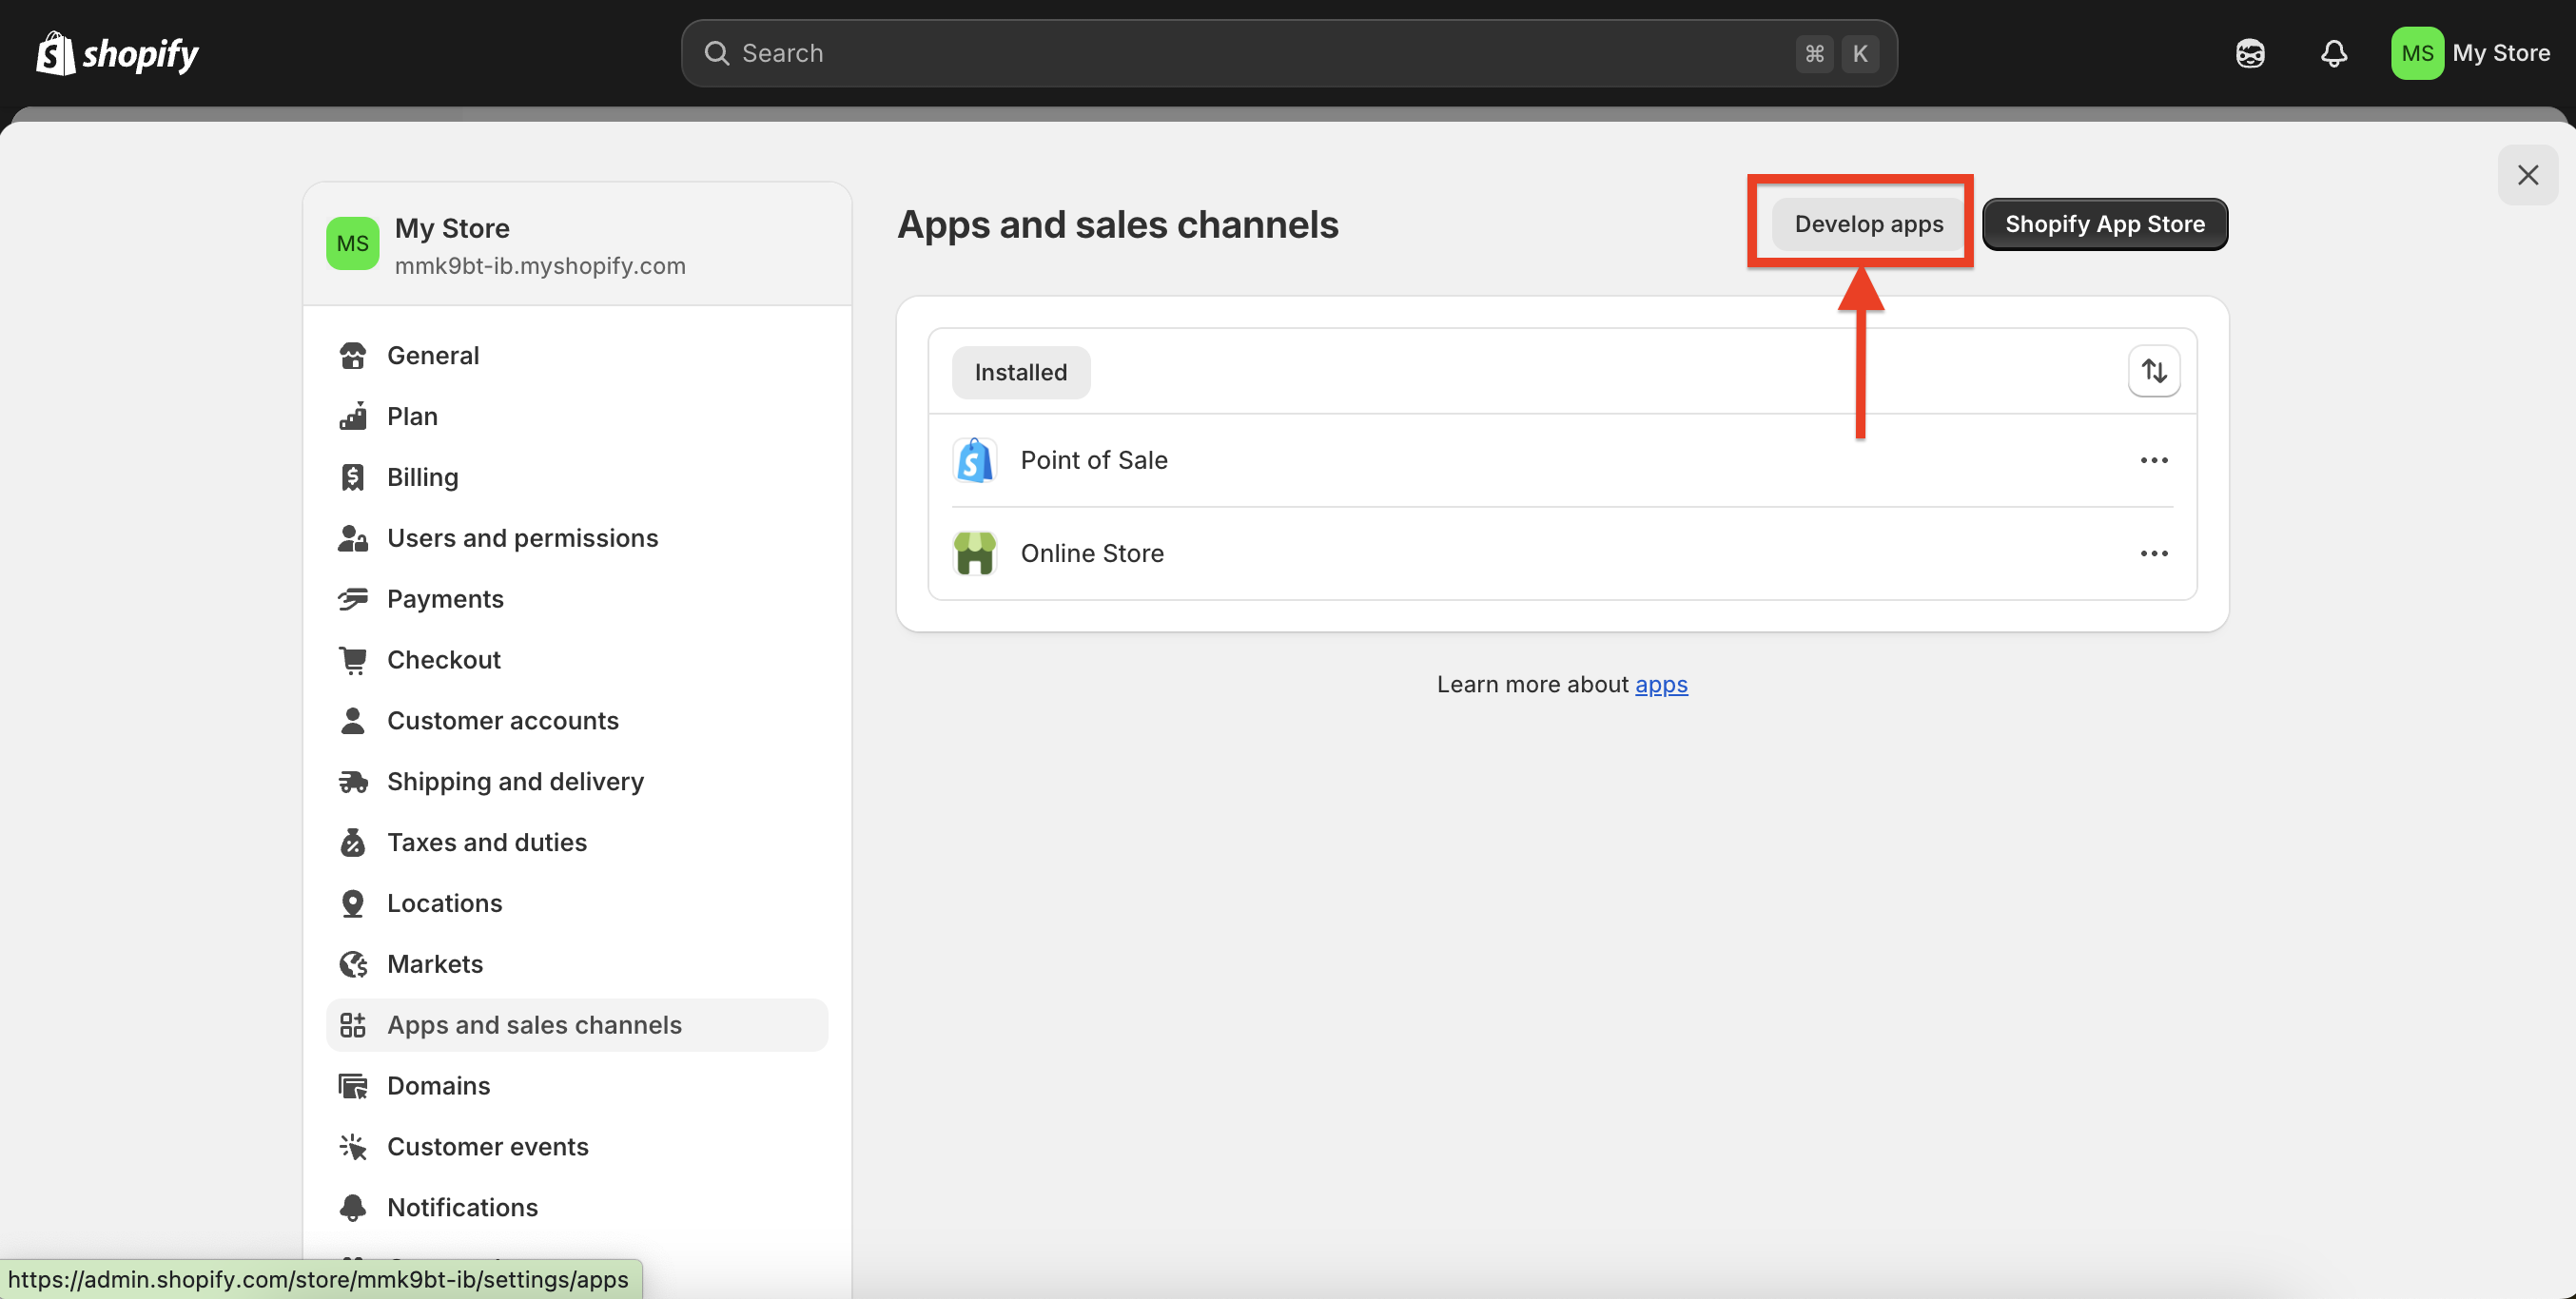
- Click the Develop apps button at the top.
- Click Create an app.
- In the popup modal, enter an App Name (e.g.,
GroupLeads Integration) and select your App developer email, then click Create app.

Step 2: Configure Admin API Scopes & Generate Access Token
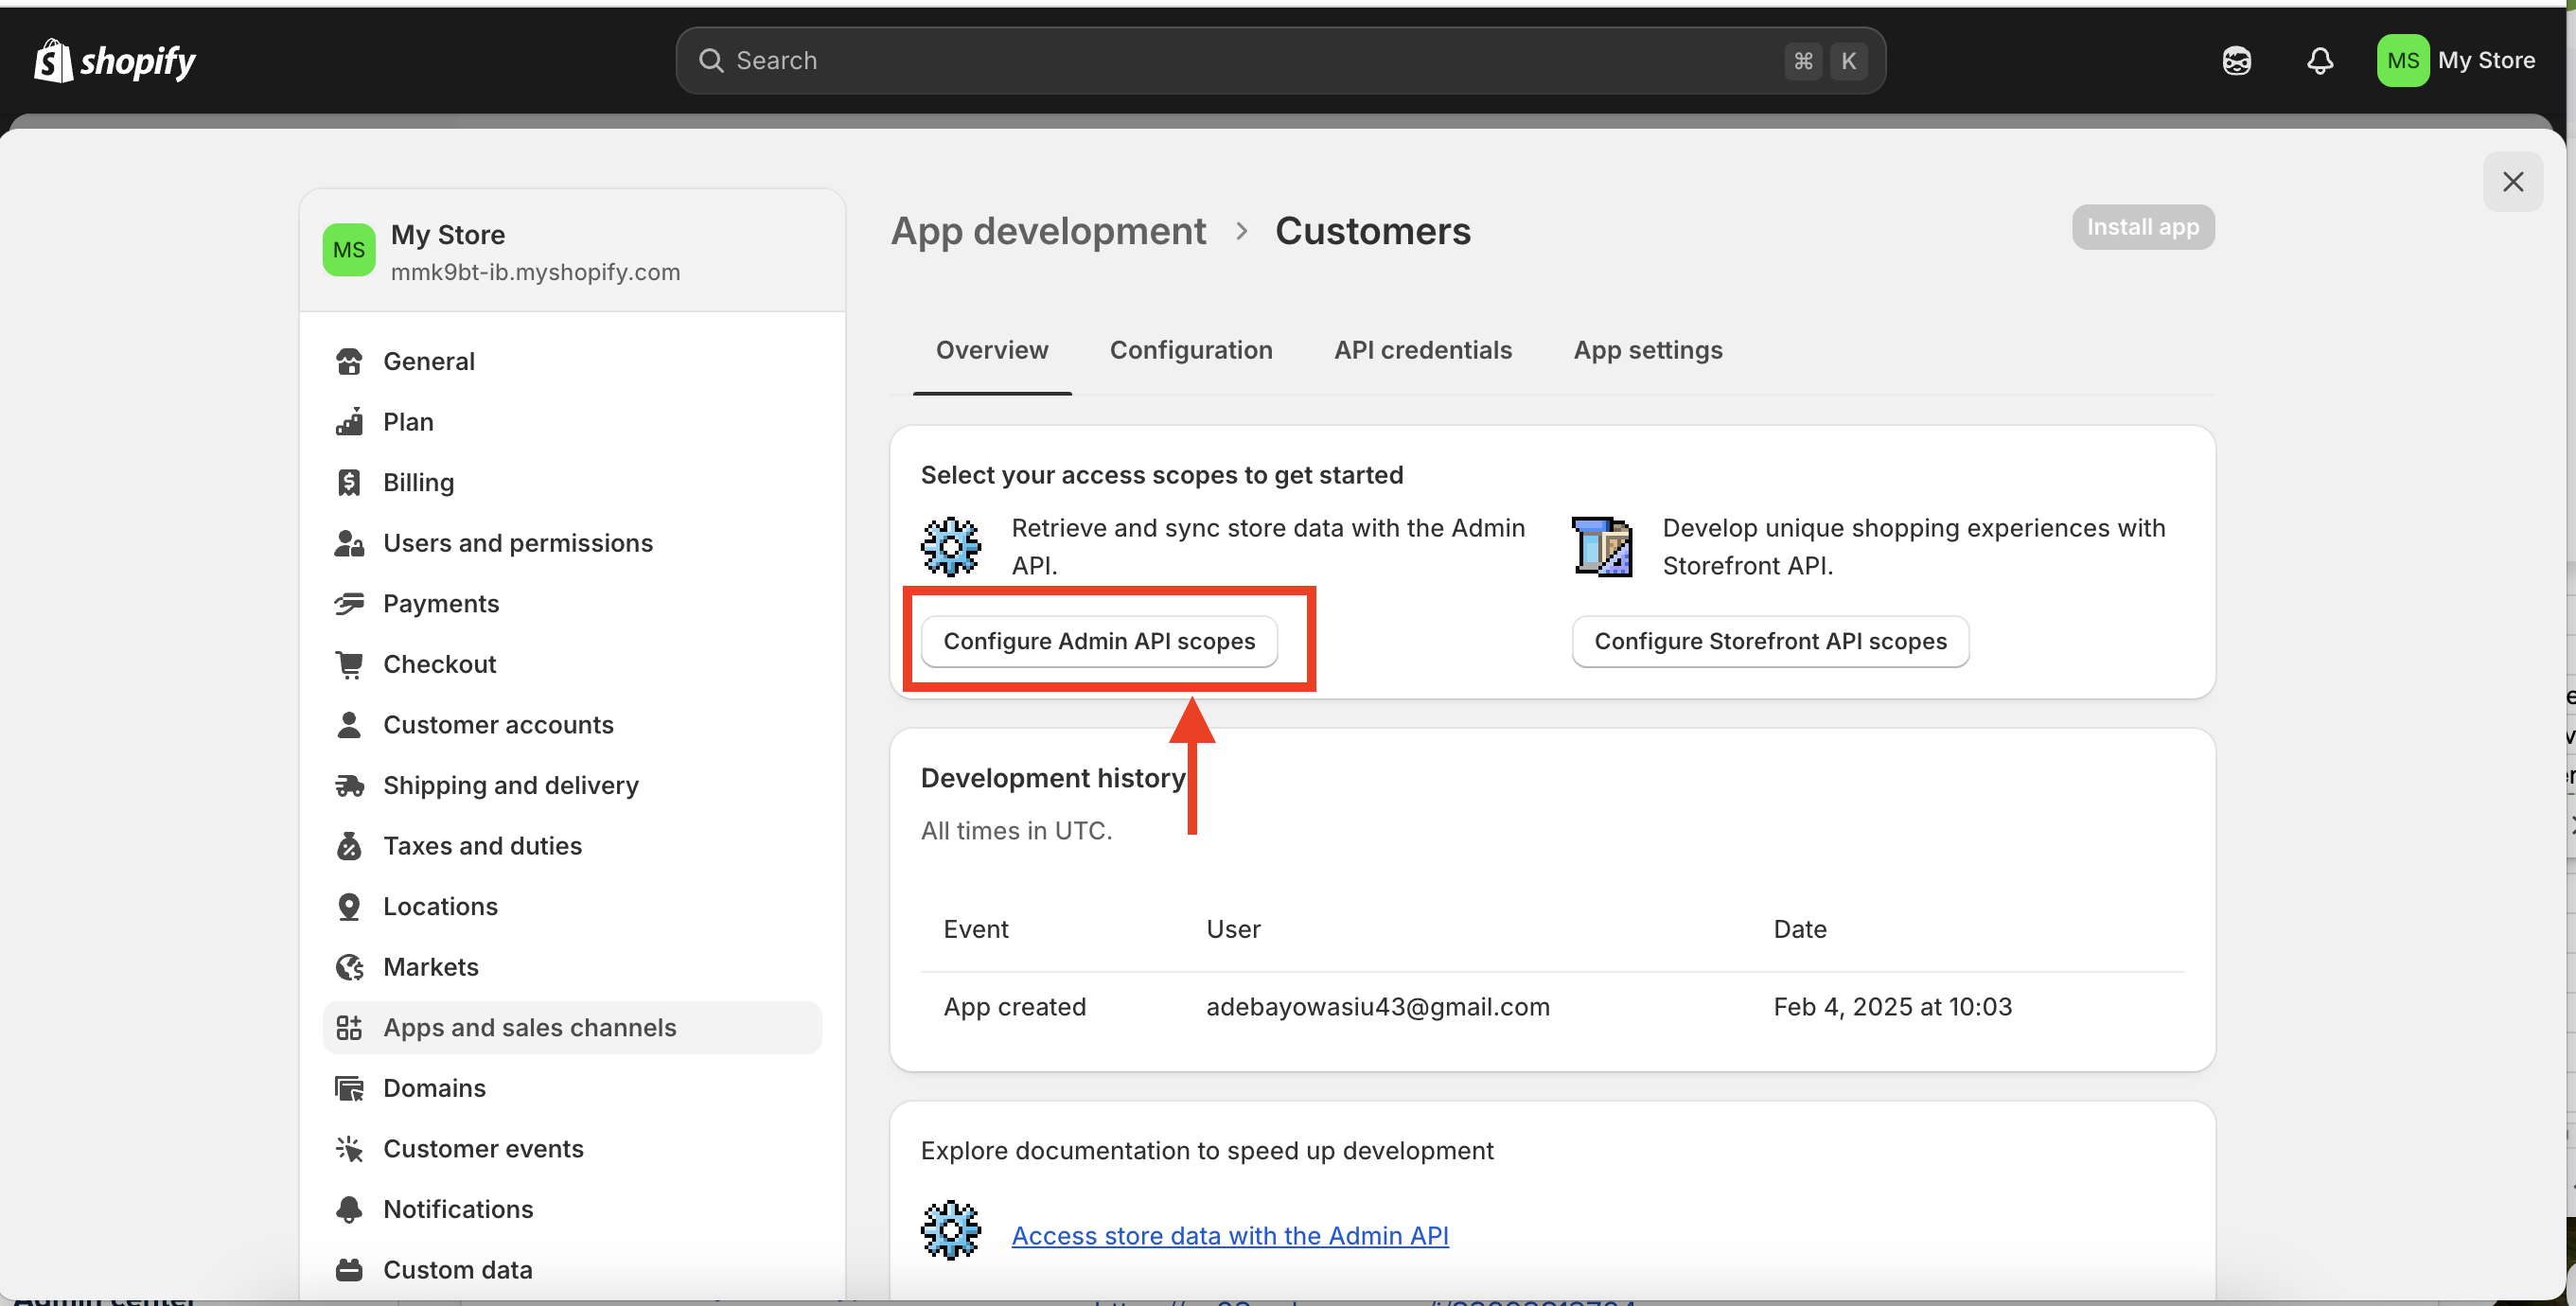
- On the Overview tab of your new app, click Configure Admin API scopes.
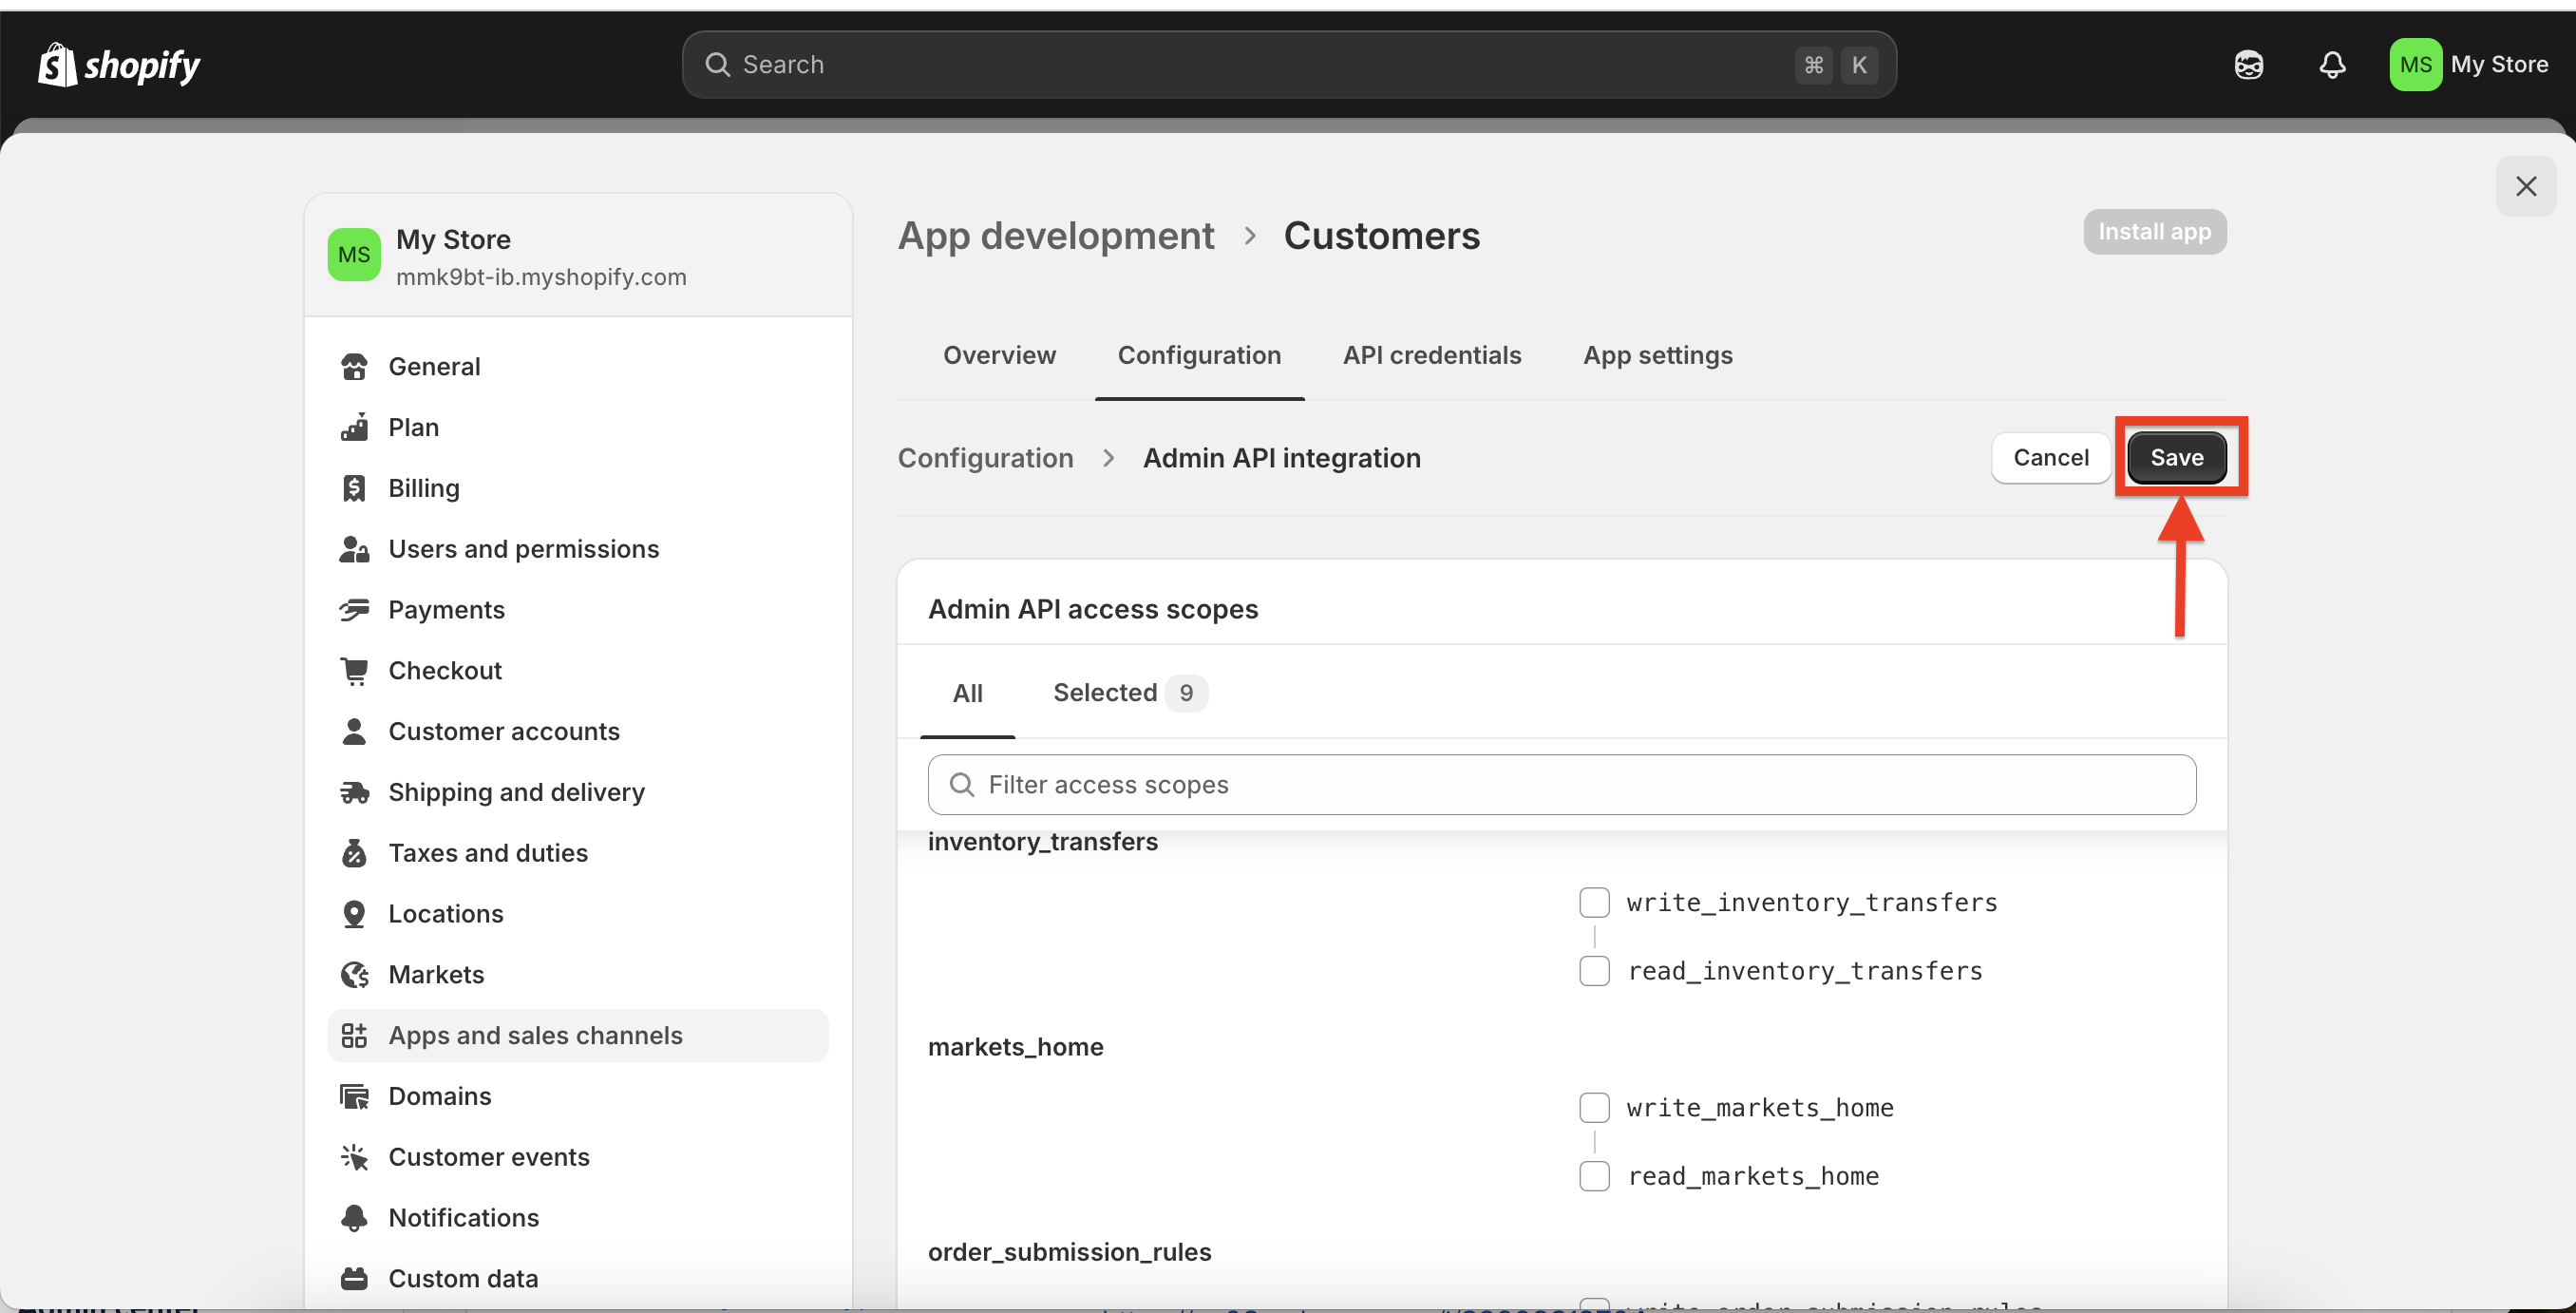
- Under the Admin API access scopes list, scroll down and check the required customer permissions:
write_customers&read_customerswrite_customer_merge&read_customer_mergeread_customer_eventsread_analyticsread_appswrite_discovery&read_discovery
- Click Save in the top-right corner.
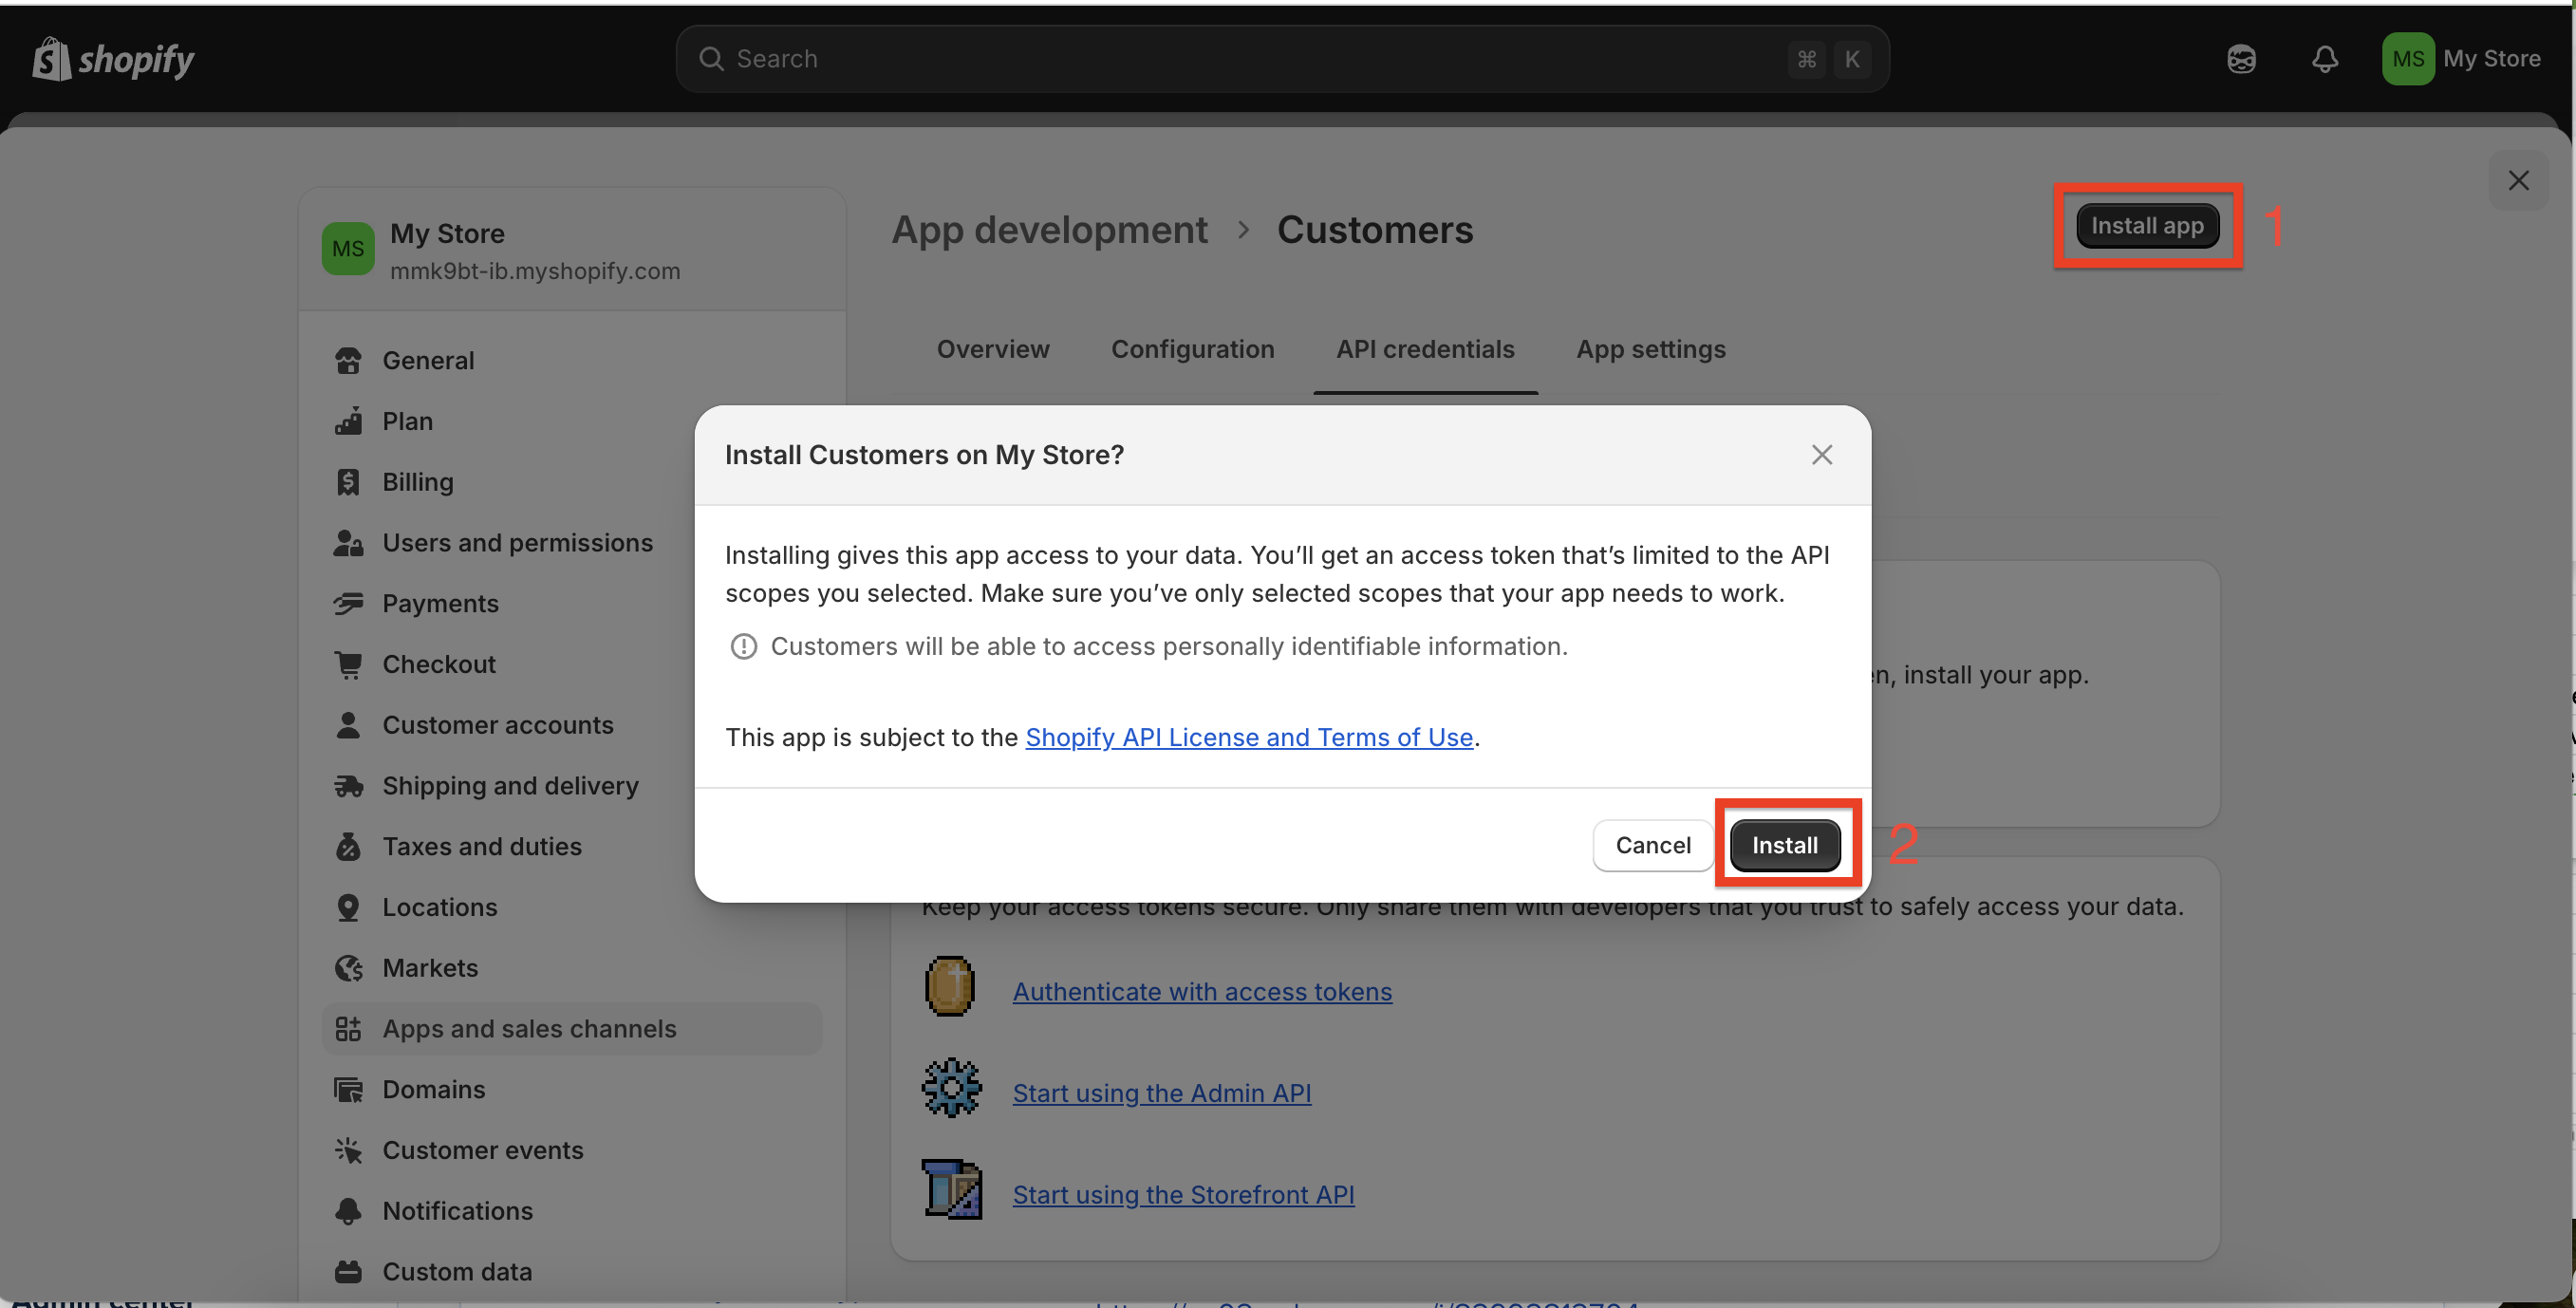
- Click the API credentials tab at the top.
- Click Install app, then confirm Install in the popup dialog.
- Under Admin API access token, click Reveal token once.
- Copy the generated Admin API Access Token (starts with
shpat_...) and save it in a temporary text file or notepad. (Important: This token is displayed only once. Store it securely).

Step 3: Copy Your Shopify Store URL
- While still in Shopify Settings (⚙), click Domains in the left sidebar menu.
- Copy your primary
.myshopify.comstore domain URL (format:yourstore.myshopify.com). - Paste and save it in your notepad alongside your Admin API Access Token.

Step 4: Open GroupLeads and Access the CRM Tab
Now switch to your browser extension to complete the connection:
- Open Google Chrome and launch the GroupLeads Chrome Extension.
- Click the gear / settings icon (⚙) next to your Facebook Group name.
- Click the CRM tab in the top navigation bar (located between Setup and Auto Responder).
- Toggle ON the Enable CRM switch to activate CRM integration and automation.

Step 5: Configure Shopify Credentials and Verify
- Under CRM Integration, select Shopify from the dropdown list.
- Toggle ON Send Questions/Answers to Shopify (if you want member Q&A responses saved).
- Enter your saved credentials into the respective input fields:
- Exact Tag Name *: Enter your desired customer tag (e.g.,
FB Group). - Access Token *: Paste your Admin API Access Token (starts with
shpat_...). - Store URL *: Paste your
.myshopify.comdomain URL (e.g.,av6i1m-td.myshopify.com).
- Exact Tag Name *: Enter your desired customer tag (e.g.,
- Click Verify & Update (or Update) to validate your credentials and save the connection. Once saved, a green Connected badge will appear.

✅ You're all set! Your Shopify store is now fully connected to GroupLeads. Every approved Facebook Group member will automatically be created as a customer in Shopify, tagged, and ready for your marketing campaigns.