How to use Group Leads Automatic Approval Feature
8This guide shows you how to enable the Automatic Approval feature in GroupLeads so that new member requests are approved automatically—while also syncing their data to your Google Sheet and connected CRM.
1. Open the GroupLeads Extension
Click the GroupLeads icon at the top-right corner of your browser. Next to the group you want to set up, click the ⚙️ Settings icon.

2. Go to the Auto Approve Tab
In the group settings popup, click the Auto Approve tab to access the automation setup.
3. Enable Automatic Approval
Toggle ON the switch next to “Enable automatic approval”. A confirmation popup will appear—click “Yes, agree” to continue.

4. Choose What Happens to Members Who Don’t Qualify
By default, GroupLeads automatically declines members who don’t meet your approval criteria.
If you prefer to leave unqualified members on the pending list instead, toggle OFF the switch next to “Automatically decline members who don't meet automation criteria”.

5. Set the Approval Interval
This sets how often GroupLeads should check and approve new requests.
- The default is every 5 minutes—ideal for low to medium-traffic groups.
- For high-traffic groups, increase the interval to reduce overlaps and avoid Facebook activity flags.

6. Define Your Approval Criteria
Decide who gets approved automatically by enabling any of the following:
Group Questions Answered
Toggle ON the switch next to “Group questions are answered”. Choose how many questions must be answered (e.g., “All questions are answered.”)

Email Provided
Toggle ON the switch next to “Email is dropped in one of the questions”.
Group Rules Accepted
Toggle ON the switch next to “New member agree to group rule(s)”.

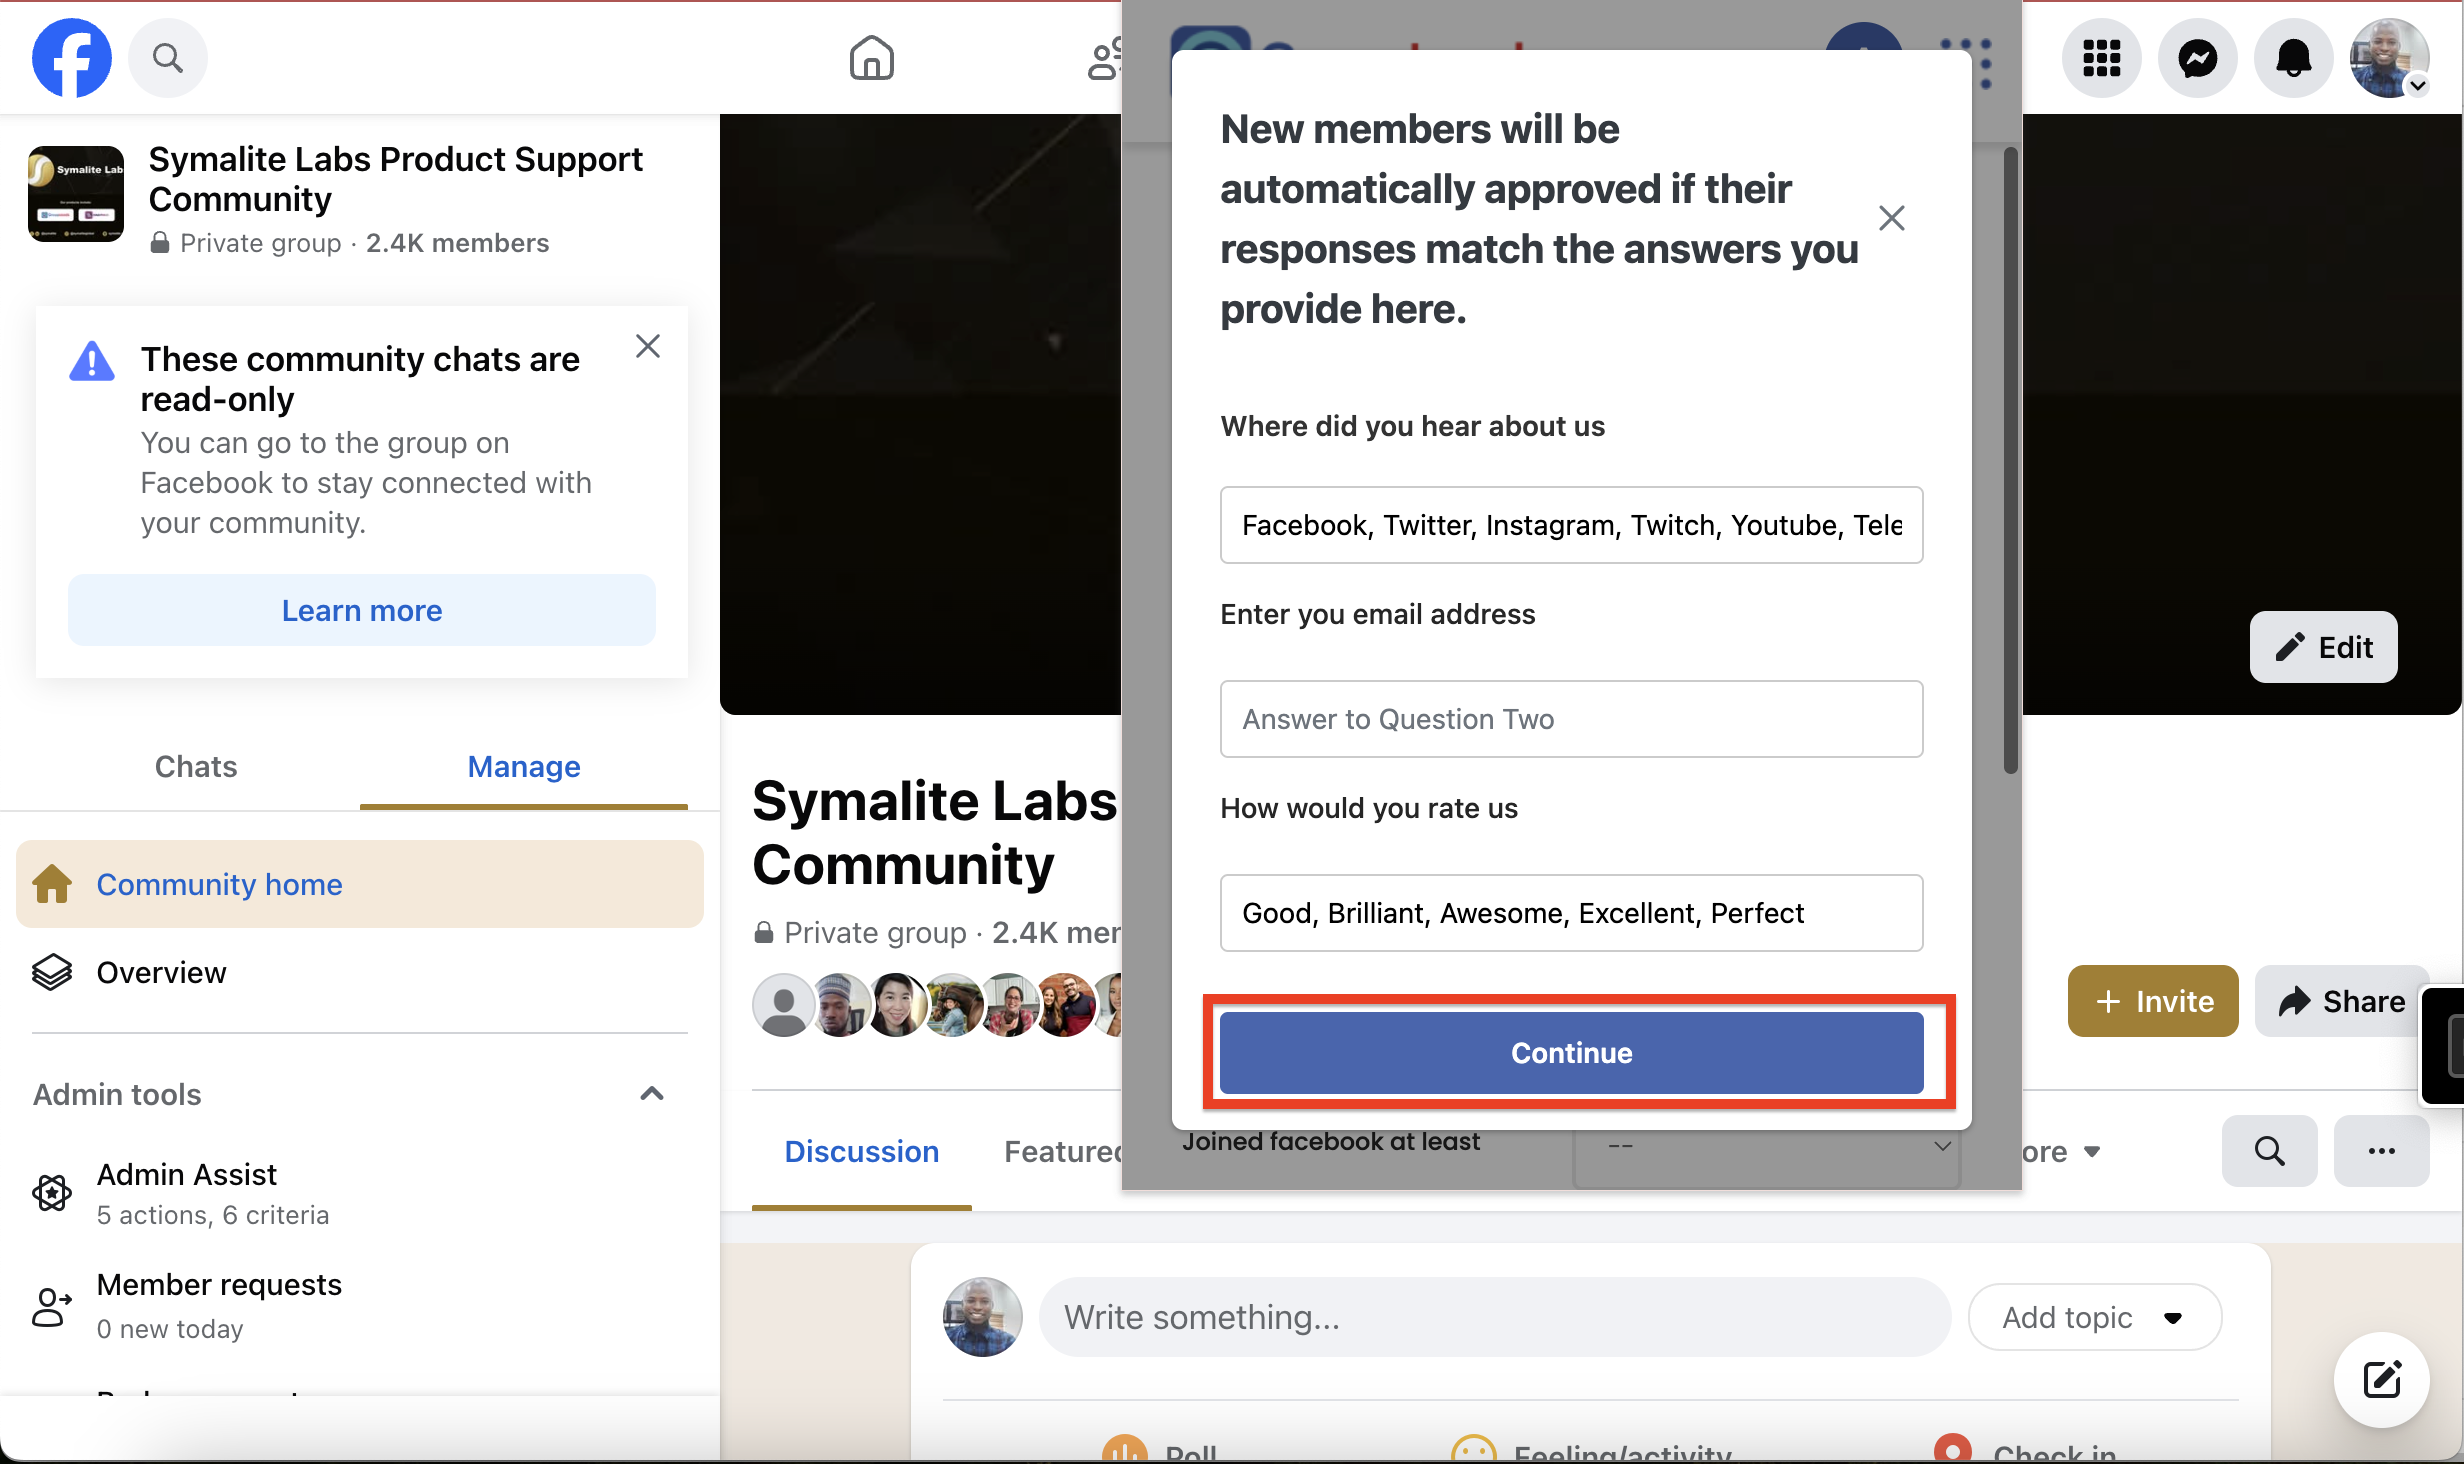
Automatically approve members if their response matches the answers you provided
Admins can now automatically approve or decline members depending on whether their responses contain the keywords specified by the admin
Turn on the switch next to “Automatically approve members if their response matches the answers

Type the correct answers for questions 1, 2, and 3 in their respective fields.Click Continue when you’re done.
7. (Optional) Set Advanced Criteria
You can optionally add other filters like:
- Gender
- Facebook join date
- Location
- Number of mutual friends
- Number of groups in common

8. Save Your Settings
Click Update. A toaster notification will confirm that your settings were saved successfully.
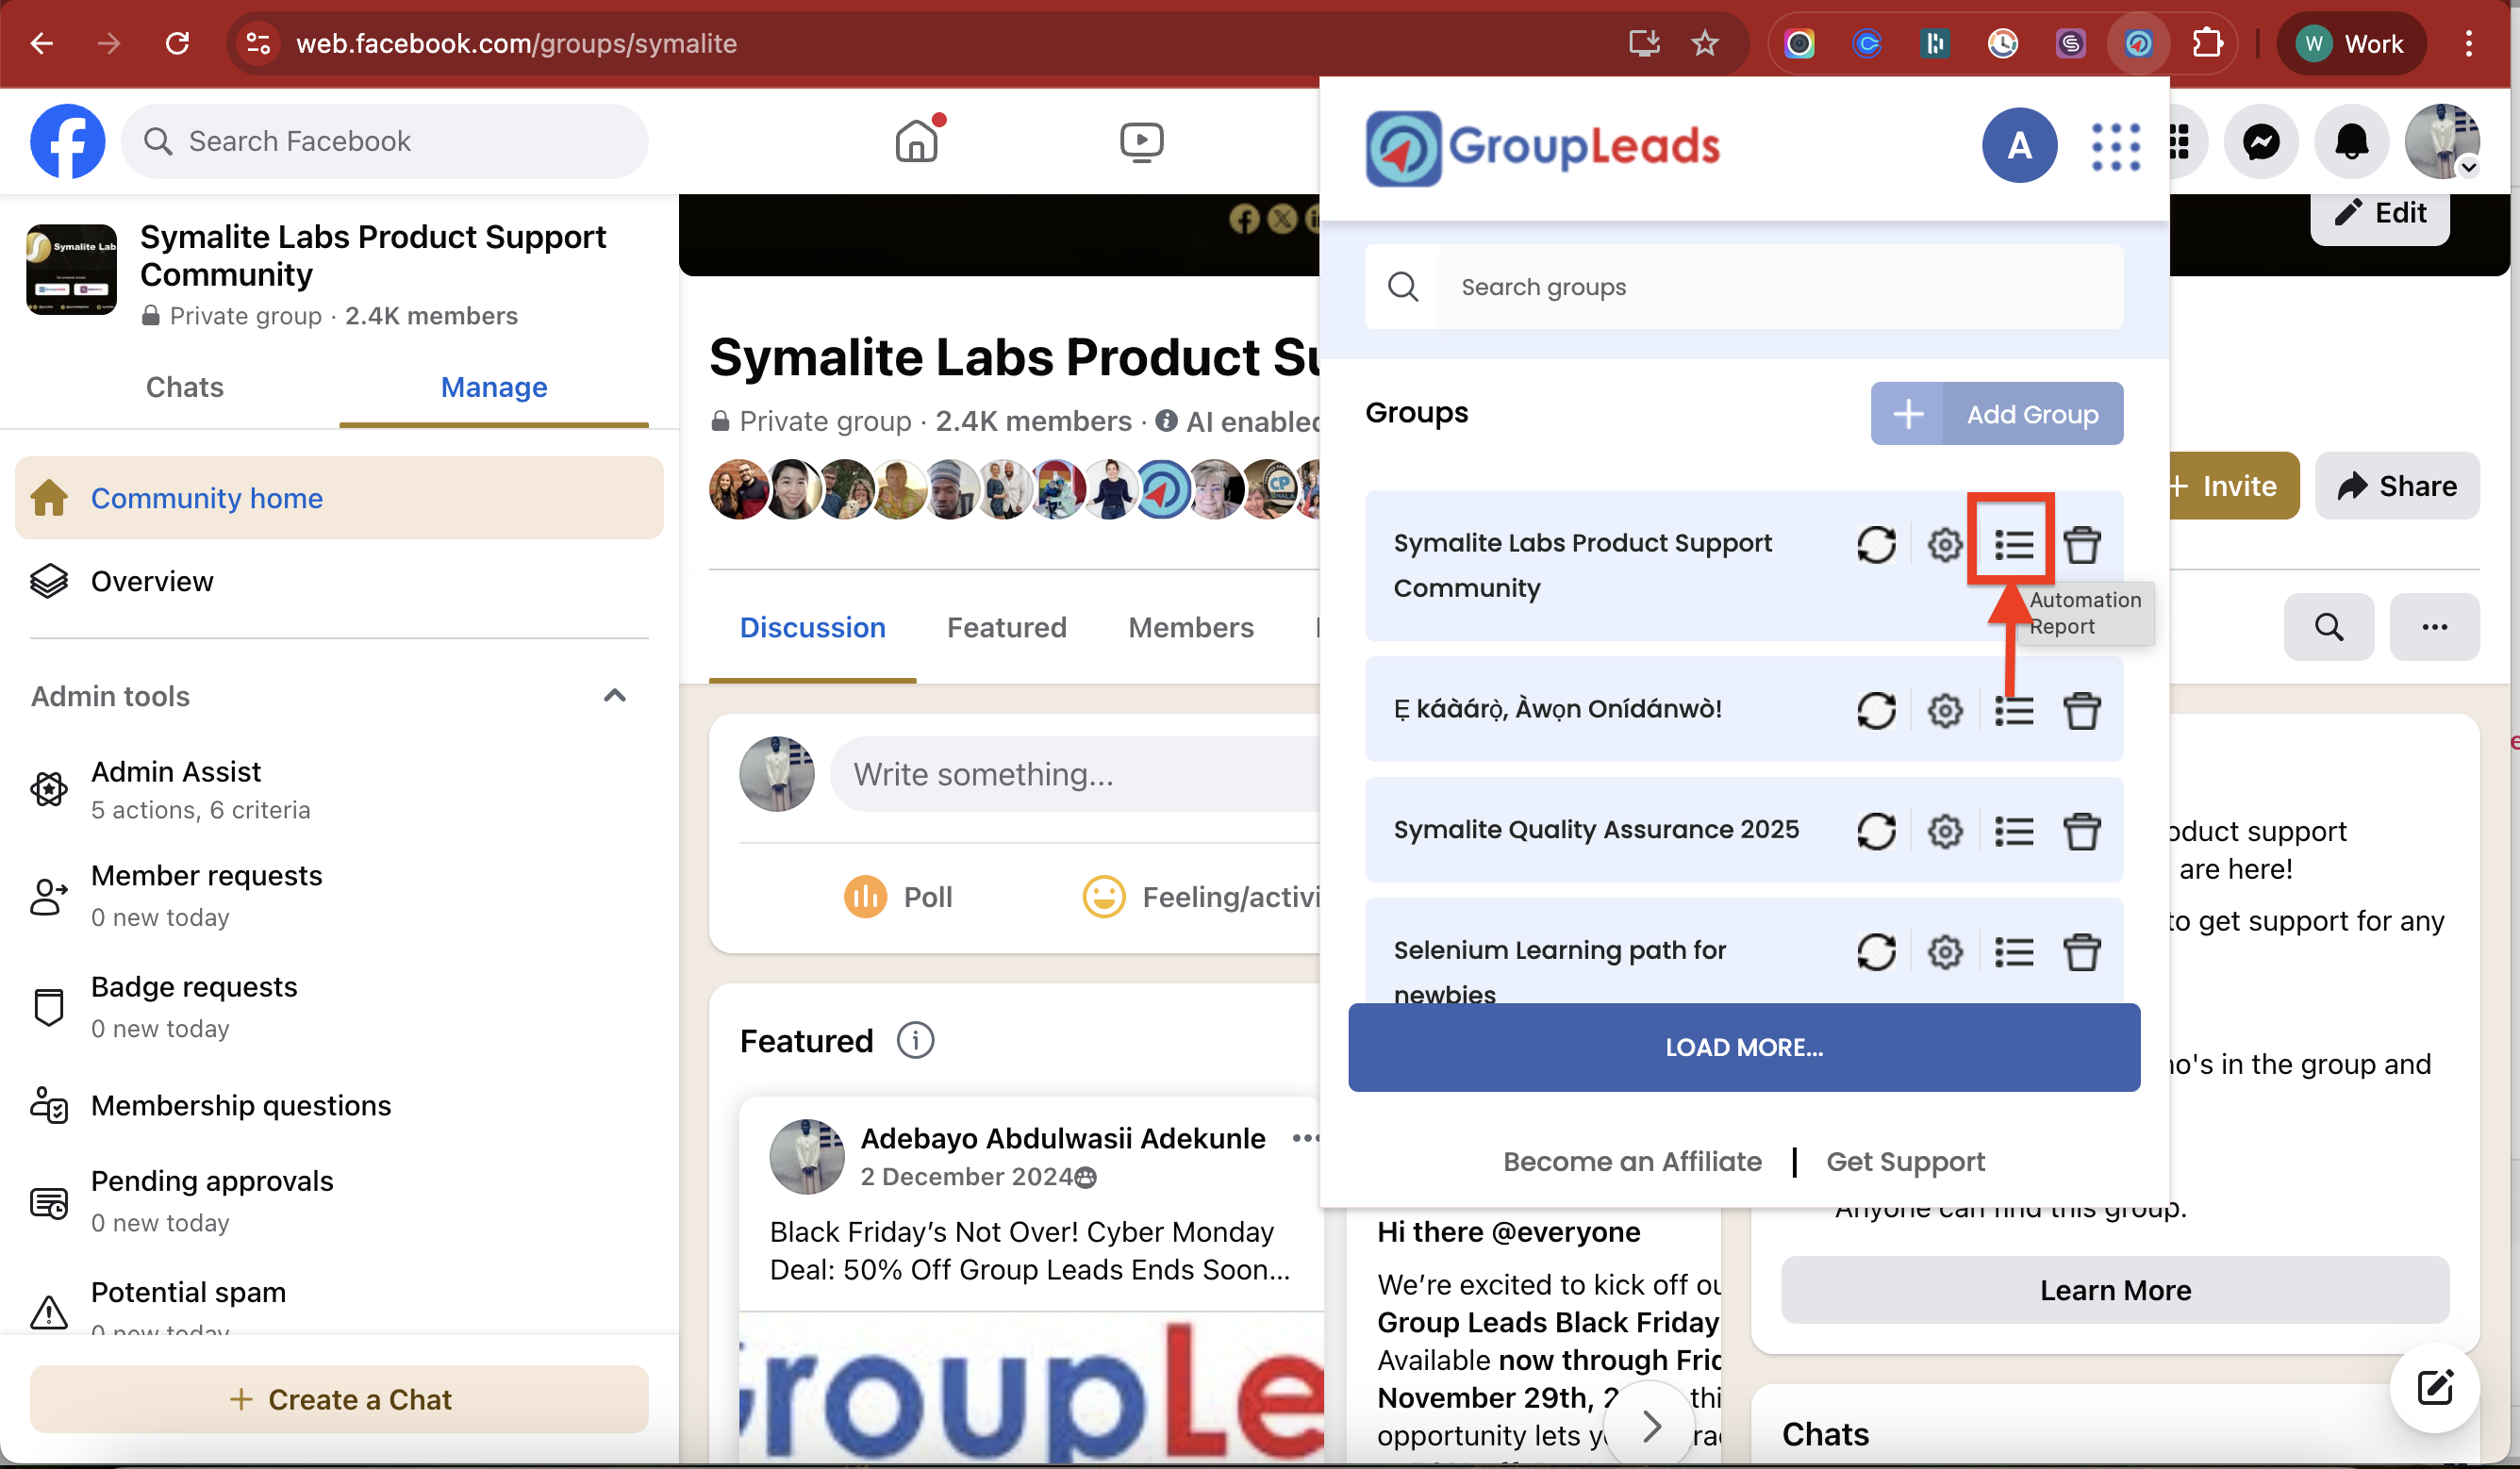
9. View Automation Report
To check when the automation last ran and when it’s scheduled to run next:
- Open the GroupLeads extension.
- Click the 📄 Automation Report icon next to your group.

⚠️ Important Notes
- If you’re enabling this for multiple groups, make sure the intervals are spaced apart to avoid conflict.
- Your browser must be open to Facebook, and your computer must be connected to the internet.
That’s it! Your group is now set up to automatically approve new members—hands-free. 🎉 If you need further help, don’t hesitate to reach out to our support team.